How to set up Google My Business: A guide

(7 - 8 minute read)
Google My Business (or GMB, for short) is a free, easy-to-use tool that all business owners need to get acquainted with. GMB lets you control and manage how your business appears in Google search results and on Google Maps. This means that, whenever someone searches for your business directly or uses a relevant local search term, you already know precisely what will show up in the Google My Business listings.
Setting up your company with Google My Business ensures that any potential customers searching for your type of business in your area will get the information they need. The last thing you want is for customers to find inaccurate map locations and missing or misleading information, especially if you’re still trying to establish your business in the local area.
With Google My Business, you can add all the essential information that you think your customers need to know. This includes everything from the business address, map location and contact information to opening hours and photographs of your premises and products. And, perhaps most crucially, Google My Business lets you view and reply to customer reviews for your business. More on this later. First, let’s look at how to set up Google My Business.
Let’s start with the basics: Setting up
Step 1: Create your account and enter your business info
To claim your place on Google My Business, you will first need to be signed into the Google Account that you wish to have associated with your business.
If your business doesn’t already have a Google Account, setting one up is really quick and easy. Once you’re up and running with your basic Google Account, simply head to google.com/business and click ‘Start Now’.

You will then be guided through a series of data fields to fill out, including:
Your business name
Your business street address (you can choose to hide this if your business isn’t a shop or restaurant)
Your exact location on Google Maps
If your business offers a delivery service you can also define your delivery area
Your business category (e.g. A restaurant, a marketing agency, a hairdresser etc.) This is important for ensuring your business is only shown to the most relevant customers
Your business telephone number and website address (if applicable)
Choose a verification method. If you’re not ready to do this yet you can select “Try a different method” and click “Later”. Or, if you are ready, you can verify your business straight away.
Step 2: Verify your business
This is an essential step to let Google know that you are who you say you are, and that your business is where you say it is. There are lots of ways in which you can do this, so it’s simply a case of choosing the most convenient for you. Verification methods include:
By postcard - Google will send a postcard to your business address with a unique 5-digit code. Simply log in to your business account, select your business location and submit the code.
By phone - If you are eligible for phone verification, select this option and enter the mobile number you want to use. You will receive a code via text, which you can enter into your account to verify your location.
By email - If you’re eligible for email verification, select this option and make sure your business email address is entered correctly. You will then be sent an email which contains a verification button; simply click this to complete your business verification.
Instant verification - This is only an option if your business is already verified with Google Search Console (a business analytics tool for search performance). If you are already verified with Search Console, you may be able to use the instant verification option.
Bulk verification - This applies if you operate 10 or more locations for the same business (except service businesses), and allows you to bulk-verify all locations at once. If you are eligible, click ‘Chain’ in your verification options and fill out all the details requested; verification can take up to a week.
Step 3: Optimise your business listing
Now your Google My Business is officially set up and verified, it’s time to bulk out your listing with all the valuable information it needs. Your verified business listing will now show up in your Google My Business dashboard; select it and click “Info”. This will then show you multiple boxes and options where you can add key information, including a business profile picture, your service areas, your opening/operating hours, accessibility information, your website URL and much more.
Something to be aware of is the fact that anyone can “Suggest An Edit” on a Google My Business profile. This makes it very important for you as the business owner to do two things:
Make sure all your information is exactly accurate to ensure others don’t feel the need to alter anything, and …
Keep logging in regularly to make sure all information is still correct and that nobody has made any false changes.

Step 4: Add your photos & media
While this is essentially a part of Step 3, we felt that adding your photos merited a section of its own. Photos are one of the most important aspects of a Google My Business listing and can really help bring it to life. What’s more, Google itself quotes in its support hub that business profiles with photos generate 35% more click-throughs than those without; a clear indication of the power of imagery. Here’s a quick explanation of the main types of photos you can add and their purpose. Let’s start with the two most important ones:
Cover Photo: This is the image that represents your business and is the first thing customers see when your listing appears. Many businesses choose to use their logo, while others use shots of the interior or exterior of their premises. Choose whatever you feel is the most representative and recognisable element of your particular business.

Profile Photo: This is the image that will show up whenever you post review responses, new photos or new videos. Again, this can be your logo if this fits best.
Other optional images and media you can add include:
Exterior Property Shots
Interior Property Shots
Product Images
Food & Drink Images
Staff Action Shots
Rooms & Common Area Shots
Staff & Team Group Shots
Videos (these must be 30 seconds or shorter, 100MB or smaller and 720p resolution or higher)
Step 5: Get to grips with Google reviews
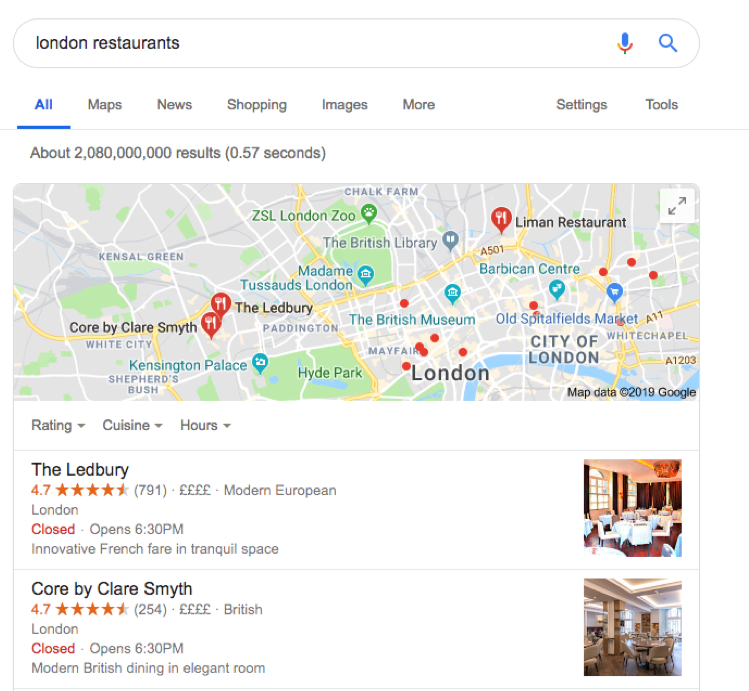
This element of the process is highly important and has been the source of some difficulty for many businesses in recent times. Reviews on Google My Business will show up on your business listing, right beneath your main information. Your overall star rating comes first, followed by the option to click through to all reviews, while a selection of full reviews will also show further down in your listing.

When it comes to Google My Business, the local reviews process is unverified and only requires the reviewer to have a Gmail account, meaning any review can, in theory, be published without verification.
Reviews usually through from the Google Local Guides program, which grants individuals points for every review they leave. Unfortunately, some of these accidentally get directed to the wrong business or contain inaccurate information, both of which can damage the reputation of the business in question.
Online reviews have proven to be an inconvenient and often frustrating element of running a business, however necessary, important and helpful they can also be. From disgruntled customers with unrealistic prior expectations to non-customers leaving unverified, fake reviews, there are many issues business owners need to be prepared to deal with when setting up a Google My Business profile.
Can I remove Fake or Negative Google reviews from my business listing?
You can fix and flag some types of negative or inappropriate reviews to Google via your Google My Business account. Simply log in to your GMB account, select the business in question and open the “Reviews” section. Find the review you’d like to flag, click the three-dot menu next to it and select “Flag as Inappropriate”. Google then may or may not choose to remove that review from your page, but will only remove it if it deems the review to violate Google’s contributor policy. If the review uses aggressive language or is clearly fake, you will usually be able to get the review removed.
This generally solves the problem of un-verified, defamatory and inappropriate reviews, but what if somebody simply leaves a one-star review with no additional comments or justification? This is, unfortunately, fairly common as leaving comments to accompany star ratings is not compulsory with Google My Business reviews. These cannot be removed as they are technically not in violation of Google’s policies, but where does that leave you as a business?
The solution to having ‘bad reviews on Google My Business’ is reaching out to real customers for new, good reviews, which will outshine the bad ones and bump up your overall score.
How to reach out for good reviews
A large percentage of your happy customers will be more than happy to leave your business a good review if you ask them to. It often requires a direct request, as people are less likely to take time out of their busy days to leave a review unless reminded.
The best ways to ask your customers for reviews include:
Ask In person: : If you interact face-to-face with your customers, there’s no harm in asking them to review their experience just before they leave. Restaurants can give review request cards along with the bill (you can offer incentives for reviews if you like), or you can ask customers to leave a review at the end of a telephone call or online chat if you run these types of services.
Conduct email follow-ups: If your customers booked a table, ordered a product or used any other online service with your business, odds are they will have needed to register an email address in order to do so. This means you can follow up with them afterwards to politely request a review of the service you received. Be sure to let them know that the process is quick and easy to complete on mobile devices to encourage more customers to leave a review.
How to respond to bad reviews
We’re only human, and mistakes can be made from time to time. Bad reviews can happen to any business no matter how successful and, while they are never good to receive, they can provide valuable lessons for all. Whether the customer received poorer-than-average service or if they had inaccurate expectations to begin with, responding to bad reviews is an essential part of running a business.
Did you know? Google My Business has introduced a new way for businesses to respond to reviews? Where previously business owners had to log in to their GMB accounts on their desktop or GMB app to respond to reviews, they can now respond directly to reviews when viewing their listing in Google Maps. This makes it quicker and easier to respond as and when the reviews come in.
Here are some tips to help you respond to negative reviews in the best possible way:
Keep a level head - Don’t attack the reviewer personally or allow the discussion to get heated, and never leave personal details such as private phone numbers or email addresses on public reply posts. Instead, suggest they contact you directly on the main restaurant email address or phone number.
Investigate the issue - Take the time to speak to the customer and investigate the specifics of the issue that sparked the poor review. Show you care.
Be honest - If mistakes were made, own up to them. However do not take personal responsibility for actions that were not your own.
Apologise - If it’s appropriate, a simple apology can go a long way. Showing compassion and empathy can often diffuse a tense situation and demonstrates to other customers that your business takes customer service seriously.
Be human - Sign off with your name or initials to show you’re a real person taking the time to reply; nobody likes an autobot.
Respond quickly - Keep on top of your reviews and respond in a timely manner. Keeping people waiting will only make the situation worse.
Following the above best-practice tips can often result in a positive outcome. The customer may update their review on how the matter was resolved, or they may remove their negative review altogether.
And don’t forget the good reviews …
Responding to the good reviews will make your customers feel valued and noticed, while also showing other customers just how much you care. You can respond to simply thank your customer for taking the time to leave such a wonderful review, and express that you look forward to seeing them again sometime in the future.
A little positive gesture goes a long way in business, so keep your happy customers happy at all times and you’ll soon see your Google My Business review score grow and grow.


